
How to Spot a Roof Leak Early (And What to Do About It)
A roof leak is every homeowner's nightmare. However, by the time you see water actively dripping from your ceiling, significant damage has likely already occurred inside the structure of your roof and walls.
The secret to saving money and stress is catching the signs of a leak early. Here is your complete guide to identifying a roof leak before it becomes a disaster, and the essential steps to take once you find it.
Part 1: Early Warning Signs You Can't Ignore
A leak doesn't always start with a drip. Look for these subtle—and not-so-subtle—indicators that water is getting in.
1. Interior Stains on Ceilings and Walls
The most common sign, but it's important to differentiate.
Water Stains: Look for discolored, often yellow, brown, or gray patches on your ceilings or running down interior walls.
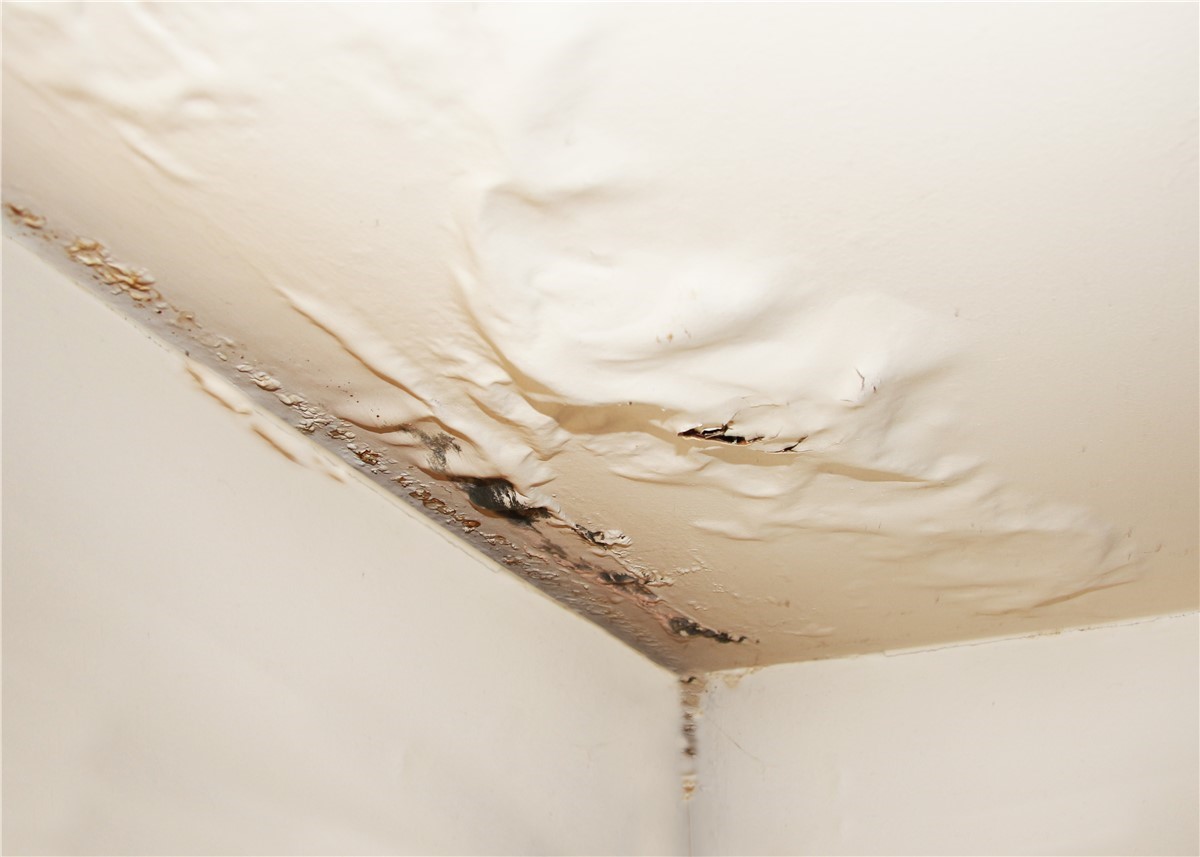
Peeling/Bubbling Paint: Moisture can cause paint or wallpaper to lose adhesion, creating bubbles or causing it to peel near the ceiling line.
The Leak Travel Trick: Remember that water doesn't travel straight down. It often runs along roof decking, rafters, or pipes before finally soaking through your drywall, meaning the stain may be several feet away from the actual entry point on the roof.
2. Musty Odors and Mold Growth
If you smell a persistent, earthy, or damp odor in your attic or upper rooms, even without visible stains, it's a huge red flag.
Musty Smell: This is the smell of trapped moisture or mildew growing in your insulation or wall cavities.
Visible Mold: Check your attic rafters, insulation, and the tops of your exterior walls for black, green, or white fuzzy patches. Mold requires moisture, and a consistent leak provides the perfect environment.
3. Damaged Flashing or Chimney Seals
Flashing is the metal seal used to protect all of the "interruptions" on your roof—the most common sources of leaks.
Look for: Damaged, loose, cracked, or rusted metal around your chimney, vents, skylights, or where the roof meets a wall (dormers). The sealant (caulk or roofing cement) around these areas can dry out and crack over time.
Flashing Failure: When flashing fails, it creates an open channel for water to pour straight into your home's structure.
4. Problems on the Roof Surface
You can often spot roof problems from the ground using binoculars, or during a professional inspection.
Missing Shingles: Even one missing shingle exposes the vulnerable underlayment.
Granules in Gutters: Asphalt shingles have a protective granular coating. Finding excessive amounts of these sand-like granules in your gutters suggests your shingles are wearing out fast.
Curling/Cracked Shingles: Shingles that curl at the edges or are visibly cracked cannot properly shed water, forcing it underneath the roofing material.
Part 2: Your Action Plan When You Find a Leak
If you suspect or confirm a leak, don't panic. Take these steps immediately to mitigate the damage and prepare for a permanent repair.
Step 1: Contain the Water (Interior)
Your immediate goal is to protect your belongings and minimize interior damage.
Clear the Area: Move furniture, electronics, and valuables away from the leak area.
Catch the Drips: Place a bucket or a large trash bin under the leak. If the water is splashing, place a piece of folded cloth or a towel at the bottom of the bucket to silence the dripping and reduce splashing.
Relieve Ceiling Pressure (If Bulging): If you see a wet bulge in your ceiling, it means water is pooling there. Carefully puncture the lowest point of the bulge with a screwdriver to allow the water to drain into your collection bucket. This relieves the weight and prevents the entire section from collapsing later.
Step 2: Stop the Leak (Temporary Exterior Fix)
⚠️ Safety First: Do not attempt to climb onto a wet, icy, or steeply pitched roof. Call a professional if it is unsafe.
Tarp the Area: If the weather is dry and it's safe to climb, cover the suspected leak area with a large, heavy-duty tarp (at least 6-mil thickness).
Secure the Tarp: Extend the tarp well beyond the suspected damage and secure it using boards or weights (never nails through the shingles themselves unless absolutely necessary and temporary). The goal is to redirect the rainwater over the damage until a permanent fix can be made.
Step 3: Call a Roofing Professional
A temporary fix is just that—temporary. To prevent long-term damage like wood rot and structural compromise, you need a lasting solution.
Schedule an Inspection: A professional roofer has the experience to safely find the exact source of the leak (which, as noted, is often not directly above the interior stain).
Document Everything: Take photos of all interior and exterior damage for your records, especially if you plan to file an insurance claim.
A small leak today can lead to thousands of dollars in repairs tomorrow. By being aware of these early signs and acting quickly, you protect your biggest investment: your home.